要約
imagettfbbox 関数が必要な情報を渡してくれるので計算しましょう。
PHP: imagettfbbox – Manual
本文
文字列を埋め込んだ画像の出力方法
PHP(というよりもサーバサイドの言語)でしばしば文字を埋め込んだ画像を作る必要がある時があります。画像は PDF 同様に環境によって見え方が変わらないと信頼できる表現方法であり、テキストとして扱うことによる利便性よりもデザイン性を重視する場合に出番があります。
デザイン抜きの基本となる文字列埋め込み画像は PHP においては次の様に作れます。これを改造してデザインをつけられるようにします。
<?php
/** dump_test_image.php ドキュメントルート直下に配置したファイル */

/** GET パラメータから値を得ます。undefined やキーだけ渡された時の対策を関数化しています */
function setGetDef(string $key,string $def){
    if(isset($_GET[$key]) && $_GET[$key] !== ''){
        return $_GET[$key];
    }
    return $def;
}

// 書き込むテキストをGETパラメータから得ます
$text = setGetDef('text', 'テスト文字列');
$imageWidth = 240;
$imageHeight = 120;
// 画像を生成します
$image = imagecreate($imageWidth, $imageHeight);

// 背景色セット(最初の imagecolorallocate は背景色セットになります)
// @see https://www.php.net/manual/ja/function.imagecolorallocate.php
imagecolorallocate($image, 255, 255, 255);
// テキスト色セット(2 回目以降の imagecolorallocate は独立した色情報になります)
// @see https://www.php.net/manual/ja/function.imagecolorallocate.php
$textColor = imagecolorallocate($image, 0, 0, 0);
// 左上に文字列を描画します
// @see https://www.php.net/manual/ja/function.imagettftext.php
imagettftext(
    $image, // 画像リソース
    12, // 文字サイズ
    0, // 文字回転角度。斜めに文字を置くときに 0 以外にします
    5, // 画像左端を 0 とした文字列左端の X 座標
    20,//  画像上端を 0 とした文字列一行目下端の Y 座標
    $textColor, // テキスト色
    __DIR__ . '/fonts/GenSenRounded-M.ttc',// フォントファイルへのパス
    $text
);

// 画像を出力します
// @see https://www.php.net/manual/ja/function.header.php
header('Content-type: image/png');
// @see https://www.php.net/manual/ja/function.imagepng.php
imagepng($image);
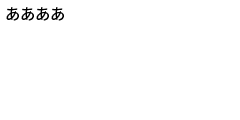
これで http://test.example.com/dump_test_image.php?text=ああああ とアクセスすると次のような’ああああ’と記述された画像が生成できます。
上下左右中央揃え
描画後の文字列の幅と高さを算出し、画像の幅と高さを計算することで縦横中央揃えを実現できます。計算の方針は文字列の余白を左右均等、上下均等にすることです。式としては次です。
X座標については
文字列を画像に埋め込んだ時の余白の幅合計 = 画像の幅 - 文字列の幅
文字列を画像に埋め込んだ時の余白の幅合計の半分 = (画像の幅 - 文字列の幅) / 2
Y座標については
文字列を画像に埋め込んだ時の余白の高さ合計 = 画像の高さ - 文字列の高さ
文字列を画像に埋め込んだ時の余白の高さ合計の半分 = (画像の高さ - 文字列の高さ) / 2
文字列を画像に埋め込んだ時の余白の高さ合計の半分を文字列の上端とした時の文字列一行目の下端Y座標 = (画像の高さ - 文字列の高さ) / 2 + 1文字の高さ
コードとしては次です。XY 座標の計算、末尾の文字列の幅と高さ取得関数が増えました。
<?php

/** GET パラメータから値を得ます。undefined やキーだけ渡された時の対策を関数化しています */
function setGetDef(string $key, string $def)
{
    if (isset($_GET[$key]) && $_GET[$key] !== '') {
        return $_GET[$key];
    }

    return $def;
}

// 書き込むテキストをGETパラメータから得ます
$text        = setGetDef('text', 'テスト文字列');
$imageWidth  = 240;
$imageHeight = 120;
// 画像を生成します
$image = imagecreate($imageWidth, $imageHeight);

// 背景色セット(最初の imagecolorallocate は背景色セットになります)
// @see https://www.php.net/manual/ja/function.imagecolorallocate.php
imagecolorallocate($image, 255, 255, 255);
// テキスト色セット(2 回目以降の imagecolorallocate は独立した色情報になります)
// @see https://www.php.net/manual/ja/function.imagecolorallocate.php
$textColor = imagecolorallocate($image, 0, 0, 0);

$size   = 24; // 文字サイズ
$angle  = 0; // 文字回転角度。斜めに文字を置くときに 0 以外にします
$font   = __DIR__.'/../storage/app/fonts/GenSenRounded-M.ttc'; // フォントファイルへのパス
$text   = imageWordwrap($size, $angle, $font, $text, $imageWidth);
$textWH = getTextSize($size, $angle, $font, $text);
// 一行目の高さ
$firstLineHeight = getTextSize($size, $angle, $font, explode("\n", $text)[0])['height'];

// 上下左右中央に文字列を描画します
// @see https://www.php.net/manual/ja/function.imagettftext.php
imagettftext(
    $image, // 画像リソース
    $size, // 文字サイズ
    $angle, // 文字回転角度。斜めに文字を置くときに 0 以外にします
    ($imageWidth - $textWH['width']) / 2, // 画像左端を 0 とした文字列左端の X 座標
     ($imageHeight - $textWH['height']) / 2 + $firstLineHeight, // 画像上端を 0 とした文字列一行目下端の Y 座標
    $textColor, // テキスト色
    $font,// フォントファイルへのパス
    $text
);

// 画像を出力します
// @see https://www.php.net/manual/ja/function.header.php
header('Content-type: image/png');
// @see https://www.php.net/manual/ja/function.imagepng.php
imagepng($image);

/**
 * @param  int    $size  文字サイズ
 * @param  int    $angle 角度
 * @param  string $font  フォントファイルへのパス
 * @param  string $text  高さと幅を知りたい文字列
 * @return array  高さと幅を格納した連想配列
 */
function getTextSize(int $size, int $angle, string $font, string $text): array
{
    // @see https://www.php.net/manual/ja/function.imagettfbbox.php
    $boundingBox = imagettfbbox($size, $angle, $font, $text);

    return [
        'width'  => $boundingBox[2] - $boundingBox[0],
        'height' => $boundingBox[1] - $boundingBox[7],
    ];
}
折り返し
ここまででもまあまあ使えるのですが、自由に文字列を埋め込もうとすると長い文字列の処理が難しくなります。長い文字列を取り扱う時に文字列が見切れない様にするには文字列を折り返す方法と画像を横に長くする方法があります。折り返しは画像の横幅を一定に保てる点で、画像サイズの変更は不意の改行を防げる点でそれぞれに利点があります。
折り返しは文字列を分解し、幅を都度測り、画像の幅を超えたら折り返す、という処理でそのまま前回の記事です。
【JavaScript】画面上に描画される一定幅で文字列を折り返す – 株式会社シーポイントラボ | 浜松のシステム・RTK-GNSS開発
これは例えば次の様にできます。画像の幅で折り返しを入れる imageWordwrap 関数が増え、描画前に描画対象文字列を imageWordwrap にかけるのみです。
<?php

/** GET パラメータから値を得ます。undefined やキーだけ渡された時の対策を関数化しています */
function setGetDef(string $key, string $def)
{
    if (isset($_GET[$key]) && $_GET[$key] !== '') {
        return $_GET[$key];
    }

    return $def;
}

// 書き込むテキストをGETパラメータから得ます
$text        = setGetDef('text', 'テスト文字列');
$imageWidth  = 240;
$imageHeight = 120;
// 画像を生成します
$image = imagecreate($imageWidth, $imageHeight);

// 背景色セット(最初の imagecolorallocate は背景色セットになります)
// @see https://www.php.net/manual/ja/function.imagecolorallocate.php
imagecolorallocate($image, 255, 255, 255);
// テキスト色セット(2 回目以降の imagecolorallocate は独立した色情報になります)
// @see https://www.php.net/manual/ja/function.imagecolorallocate.php
$textColor = imagecolorallocate($image, 0, 0, 0);

$size   = 24; // 文字サイズ
$angle  = 0; // 文字回転角度。斜めに文字を置くときに 0 以外にします
$font   = __DIR__.'/../storage/app/fonts/GenSenRounded-M.ttc'; // フォントファイルへのパス
$text   = imageWordwrap($size, $angle, $font, $text, $imageWidth);
$textWH = getTextSize($size, $angle, $font, $text);
// 一行目の高さ
$firstLineHeight = getTextSize($size, $angle, $font, explode("\n", $text)[0])['height'];

// 上下左右中央に文字列を描画します
// @see https://www.php.net/manual/ja/function.imagettftext.php
imagettftext(
    $image, // 画像リソース
    $size, // 文字サイズ
    $angle, // 文字回転角度。斜めに文字を置くときに 0 以外にします
    ($imageWidth - $textWH['width']) / 2, // 画像左端を 0 とした文字列左端の X 座標
     ($imageHeight - $textWH['height']) / 2 + $firstLineHeight, // 画像上端を 0 とした文字列一行目下端の Y 座標
    $textColor, // テキスト色
    $font,// フォントファイルへのパス
    $text
);

// 画像を出力します
// @see https://www.php.net/manual/ja/function.header.php
header('Content-type: image/png');
// @see https://www.php.net/manual/ja/function.imagepng.php
imagepng($image);

/**
 * @param  int    $size  文字サイズ
 * @param  int    $angle 角度
 * @param  string $font  フォントファイルへのパス
 * @param  string $text  高さと幅を知りたい文字列
 * @return array  高さと幅を格納した連想配列
 */
function getTextSize(int $size, int $angle, string $font, string $text): array
{
    // @see https://www.php.net/manual/ja/function.imagettfbbox.php
    $boundingBox = imagettfbbox($size, $angle, $font, $text);

    return [
        'width'  => $boundingBox[2] - $boundingBox[0],
        'height' => $boundingBox[1] - $boundingBox[7],
    ];
}

/**
 * 画像の幅で折り返し
 * @param  int    $size       文字サイズ
 * @param  int    $angle      角度
 * @param  string $font       フォントファイルへのパス
 * @param  string $text       高さと幅を知りたい文字列
 * @param  int    $imageWidth 画像の幅
 * @param  string $break      改行文字
 * @return string
 */
function imageWordwrap(
    int $size,
    int $angle,
    string $font,
    string $text,
    int $imageWidth,
    string $break = "\r\n"
): string {
    /** @var string[] $cahrs 1文字ずつに分解。絵文字非対応。対応するライブラリとフォントを見つける必要あり */
    $chars       = mb_str_split($text);
    $lines       = [];
    $currentLine = '';
    foreach ($chars as $ch) {
        $wh = getTextSize($size, $angle, $font, $currentLine.$ch);
        if ($wh['width'] > $imageWidth) {
            $lines[]     = $currentLine;
            $currentLine = $ch;
        } else {
            $currentLine .= $ch;
        }
    }
    $lines[] = $currentLine;

    return implode($break, $lines);
}
これを動かすと次のような画像を出力できます。
画像サイズを文字列幅に合わせた可変長にする
画像サイズの可変は描画前に文字列の描画サイズが画像サイズより大きければ画像サイズをそれに合わせて設定しなおすのみです。これは次の様にできます。描画直前に if 文が増え、そこで白紙の画像を文字列サイズに合わせて再生成しています。
<?php

/** GET パラメータから値を得ます。undefined やキーだけ渡された時の対策を関数化しています */
function setGetDef(string $key, string $def)
{
    if (isset($_GET[$key]) && $_GET[$key] !== '') {
        return $_GET[$key];
    }

    return $def;
}

// 書き込むテキストをGETパラメータから得ます
$text        = setGetDef('text', 'テスト文字列');
$imageWidth  = 240;
$imageHeight = 120;
// 画像を生成します
$image = imagecreate($imageWidth, $imageHeight);

// 背景色セット(最初の imagecolorallocate は背景色セットになります)
// @see https://www.php.net/manual/ja/function.imagecolorallocate.php
imagecolorallocate($image, 255, 255, 255);
// テキスト色セット(2 回目以降の imagecolorallocate は独立した色情報になります)
// @see https://www.php.net/manual/ja/function.imagecolorallocate.php
$textColor = imagecolorallocate($image, 0, 0, 0);

$size   = 24; // 文字サイズ
$angle  = 0; // 文字回転角度。斜めに文字を置くときに 0 以外にします
$font   = __DIR__.'/../storage/app/fonts/GenSenRounded-M.ttc'; // フォントファイルへのパス
$textWH = getTextSize($size, $angle, $font, $text);
// 一行目の高さ
$firstLineHeight = getTextSize($size, $angle, $font, explode("\n", $text)[0])['height'];
if($textWH['width'] > $imageWidth){
    // 画像を再度生成します
    $imageWidth = $textWH['width'];
    $image = imagecreate($imageWidth, $imageHeight);

    // 背景色再セット(最初の imagecolorallocate は背景色セットになります)
    // @see https://www.php.net/manual/ja/function.imagecolorallocate.php
    imagecolorallocate($image, 255, 255, 255);
    // テキスト色再セット(2 回目以降の imagecolorallocate は独立した色情報になります)
    // @see https://www.php.net/manual/ja/function.imagecolorallocate.php
    $textColor = imagecolorallocate($image, 0, 0, 0);
}

// 上下左右中央に文字列を描画します
// @see https://www.php.net/manual/ja/function.imagettftext.php
imagettftext(
    $image, // 画像リソース
    $size, // 文字サイズ
    $angle, // 文字回転角度。斜めに文字を置くときに 0 以外にします
    ($imageWidth - $textWH['width']) / 2, // 画像左端を 0 とした文字列左端の X 座標
     ($imageHeight - $textWH['height']) / 2 + $firstLineHeight, // 画像上端を 0 とした文字列一行目下端の Y 座標
    $textColor, // テキスト色
    $font,// フォントファイルへのパス
    $text
);

// 画像を出力します
// @see https://www.php.net/manual/ja/function.header.php
header('Content-type: image/png');
// @see https://www.php.net/manual/ja/function.imagepng.php
imagepng($image);

/**
 * @param  int    $size  文字サイズ
 * @param  int    $angle 角度
 * @param  string $font  フォントファイルへのパス
 * @param  string $text  高さと幅を知りたい文字列
 * @return array  高さと幅を格納した連想配列
 */
function getTextSize(int $size, int $angle, string $font, string $text): array
{
    // @see https://www.php.net/manual/ja/function.imagettfbbox.php
    $boundingBox = imagettfbbox($size, $angle, $font, $text);

    return [
        'width'  => $boundingBox[2] - $boundingBox[0],
        'height' => $boundingBox[1] - $boundingBox[7],
    ];
}
これを動かすと次のような画像を出力できます。

この様に描画前の文字列サイズなどの小さな要素と計算によって普段 HTML 上の CSS でやっていることを特別なシステムのない画像上でも都度再現できます。

